![Smoothx_Logo_FC_White_RGB.png]](https://support.smoothx.com/hs-fs/hubfs/Smoothx_Logo_FC_White_RGB.png?height=20&name=Smoothx_Logo_FC_White_RGB.png)
Capture retention retained or released directly in ProScan+.
User Procore's default retention (located on the Procore Purchase Order/SubContrct) or enter a value/% in ProScan+.
Retention can be entered as an Amount or Percentage.
Enable Retention Settings
- Log in to your Smoothx Tools - https://tools.smoothx.com/
- Select ProScan+ Application
- Select the Settings menu

- Select Features
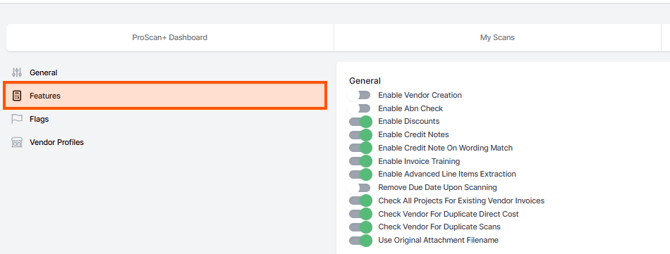
- Go to Invoicing
- Enable:
- Automatically Populated Commitment Retention
- Retains the commitment's default retainage % on every line of the progress claim.
- Enable Invoice Retention Management
- Adds two columns to the line items of a progress claim scan, Retention Retained and Retention Released, so the amounts can be set per line.
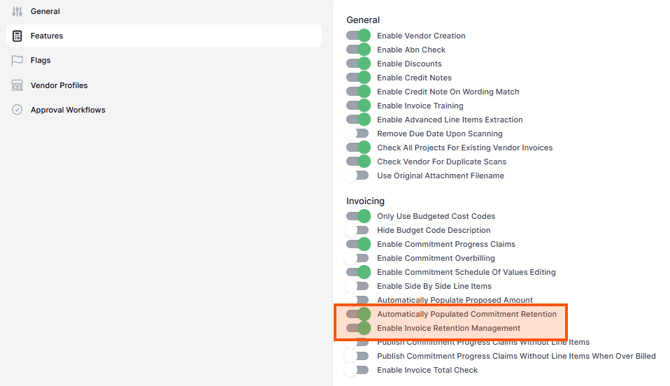
NOTE: Retention amounts entered in ProScan+ will override the commitment default in Procore.
How to Apply Retention
- Open Smoothx Tools and select ProScan+
- Navigate to My Scans
-
Open the selected scan (Progress Claims only)
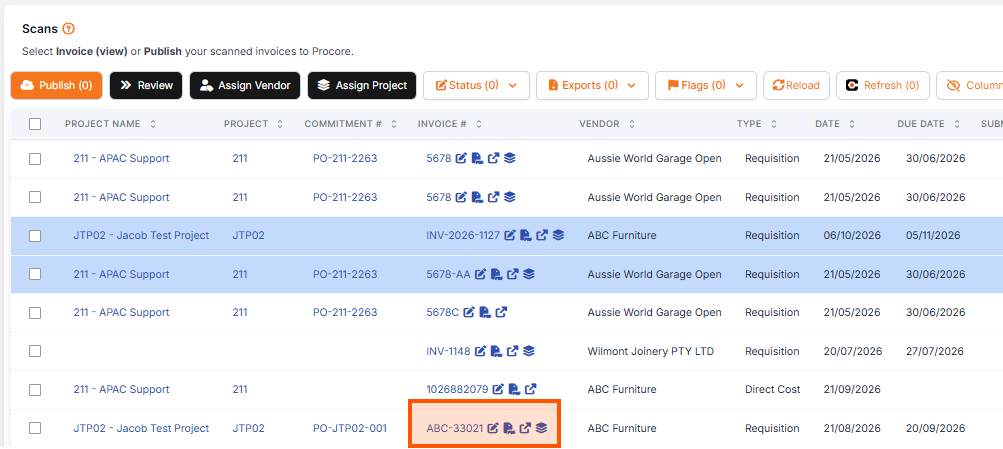
- Retention can be applied to each Line Item:
- Enter an Amount - Type the dollar amount against each line. Note: Retention is managed per SOV line, e.g. 3 expense lines of $50.00, against SOV line 1 = a total of $150.00.
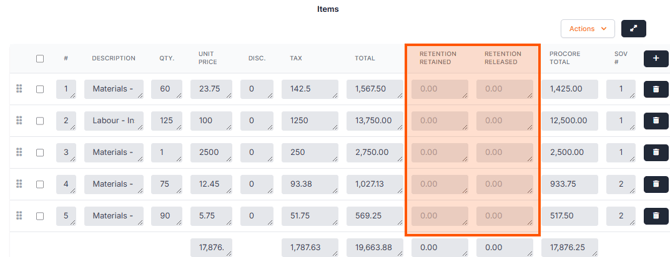
- Apply a % to each line - Tick the selected line items > Click Actions > Select Set Retention Retained % or Set Retention Released %
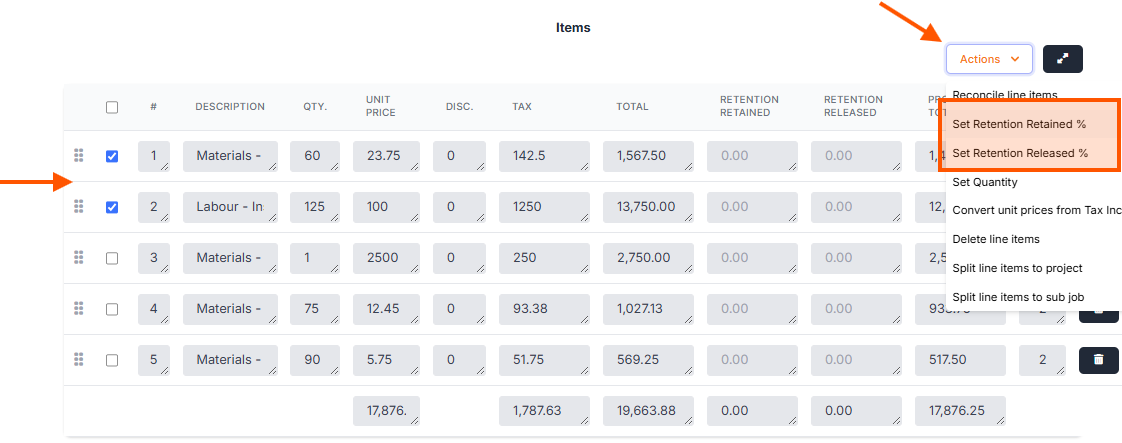
- Enter an Amount - Type the dollar amount against each line. Note: Retention is managed per SOV line, e.g. 3 expense lines of $50.00, against SOV line 1 = a total of $150.00.